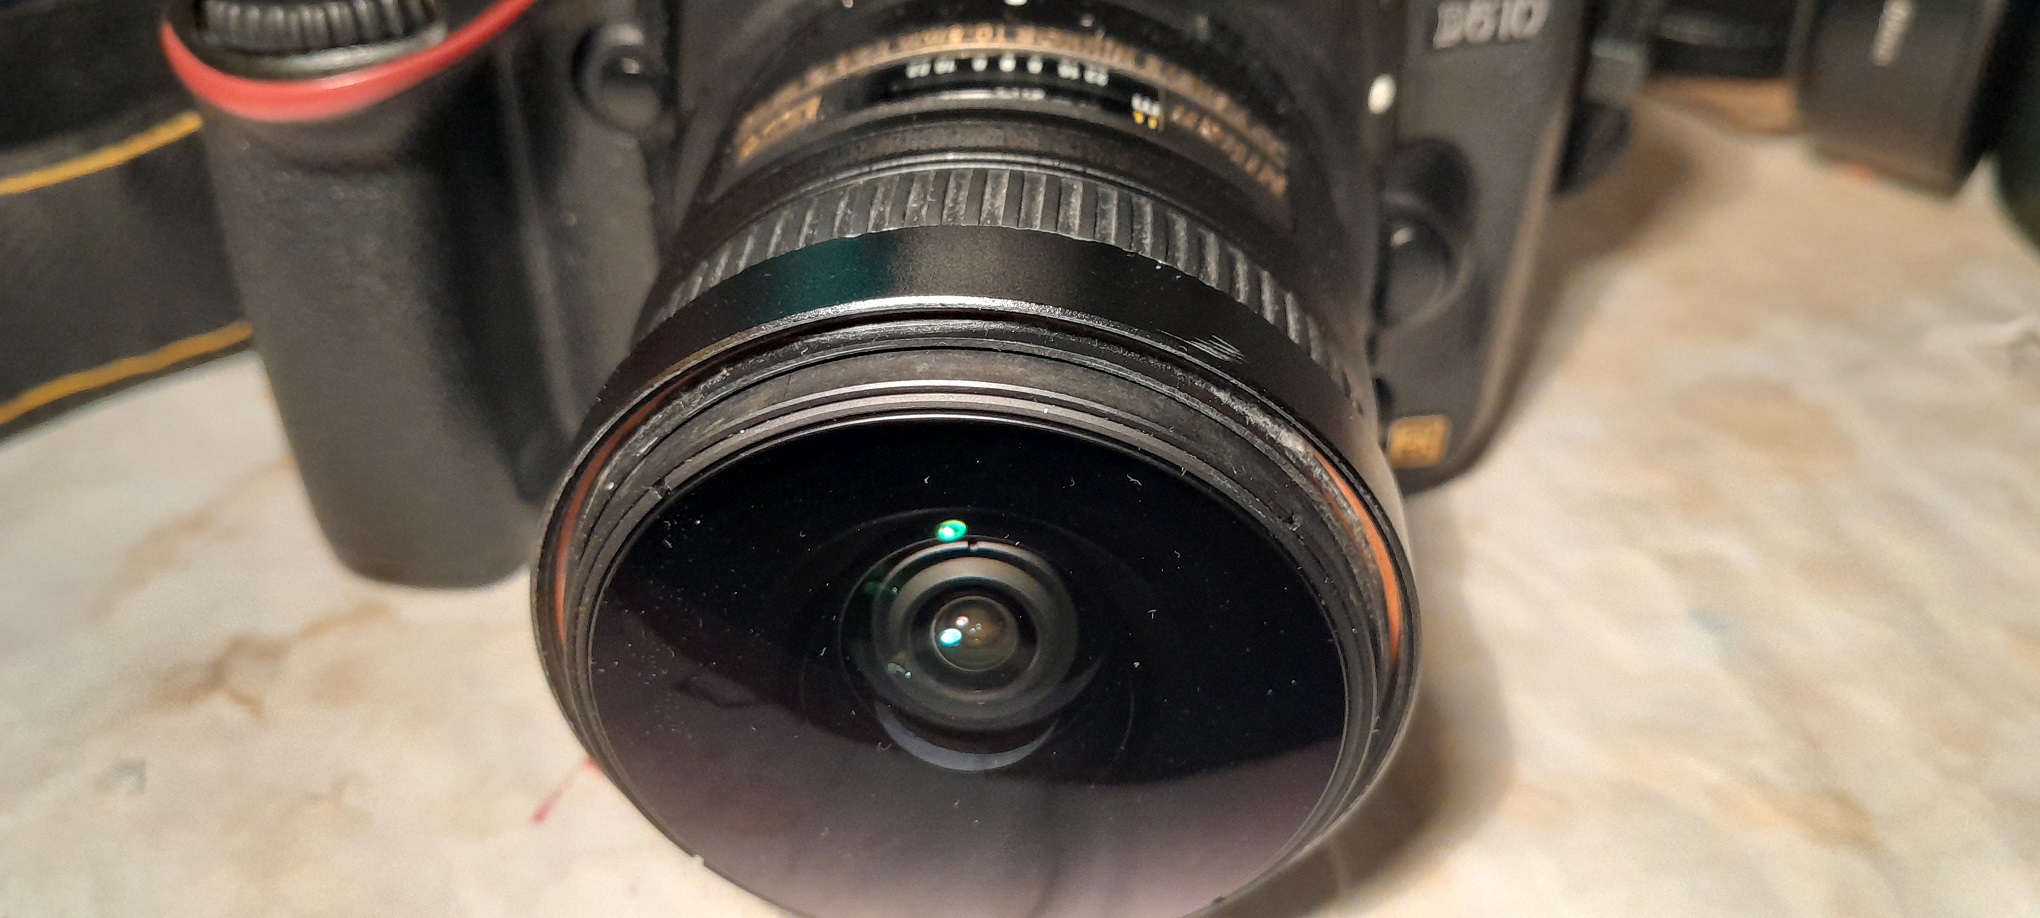
Third attempt to reseal was the charm. First attempt was to use the existing left over piece from the petal removal. That would have been fine but I wanted to get too cute to machine it like the final result, however, it was clear that I couldn't make it thin enough for what I wanted. Second attempt ended up too tight so I started over. Here is the third attempt. As will be clear, and is appropriate the the title of this forum, I probably made things much more complicated than they needed to be since I wanted to be able to screw in the lens hood cap and not limit the field of view with the added assemblies.
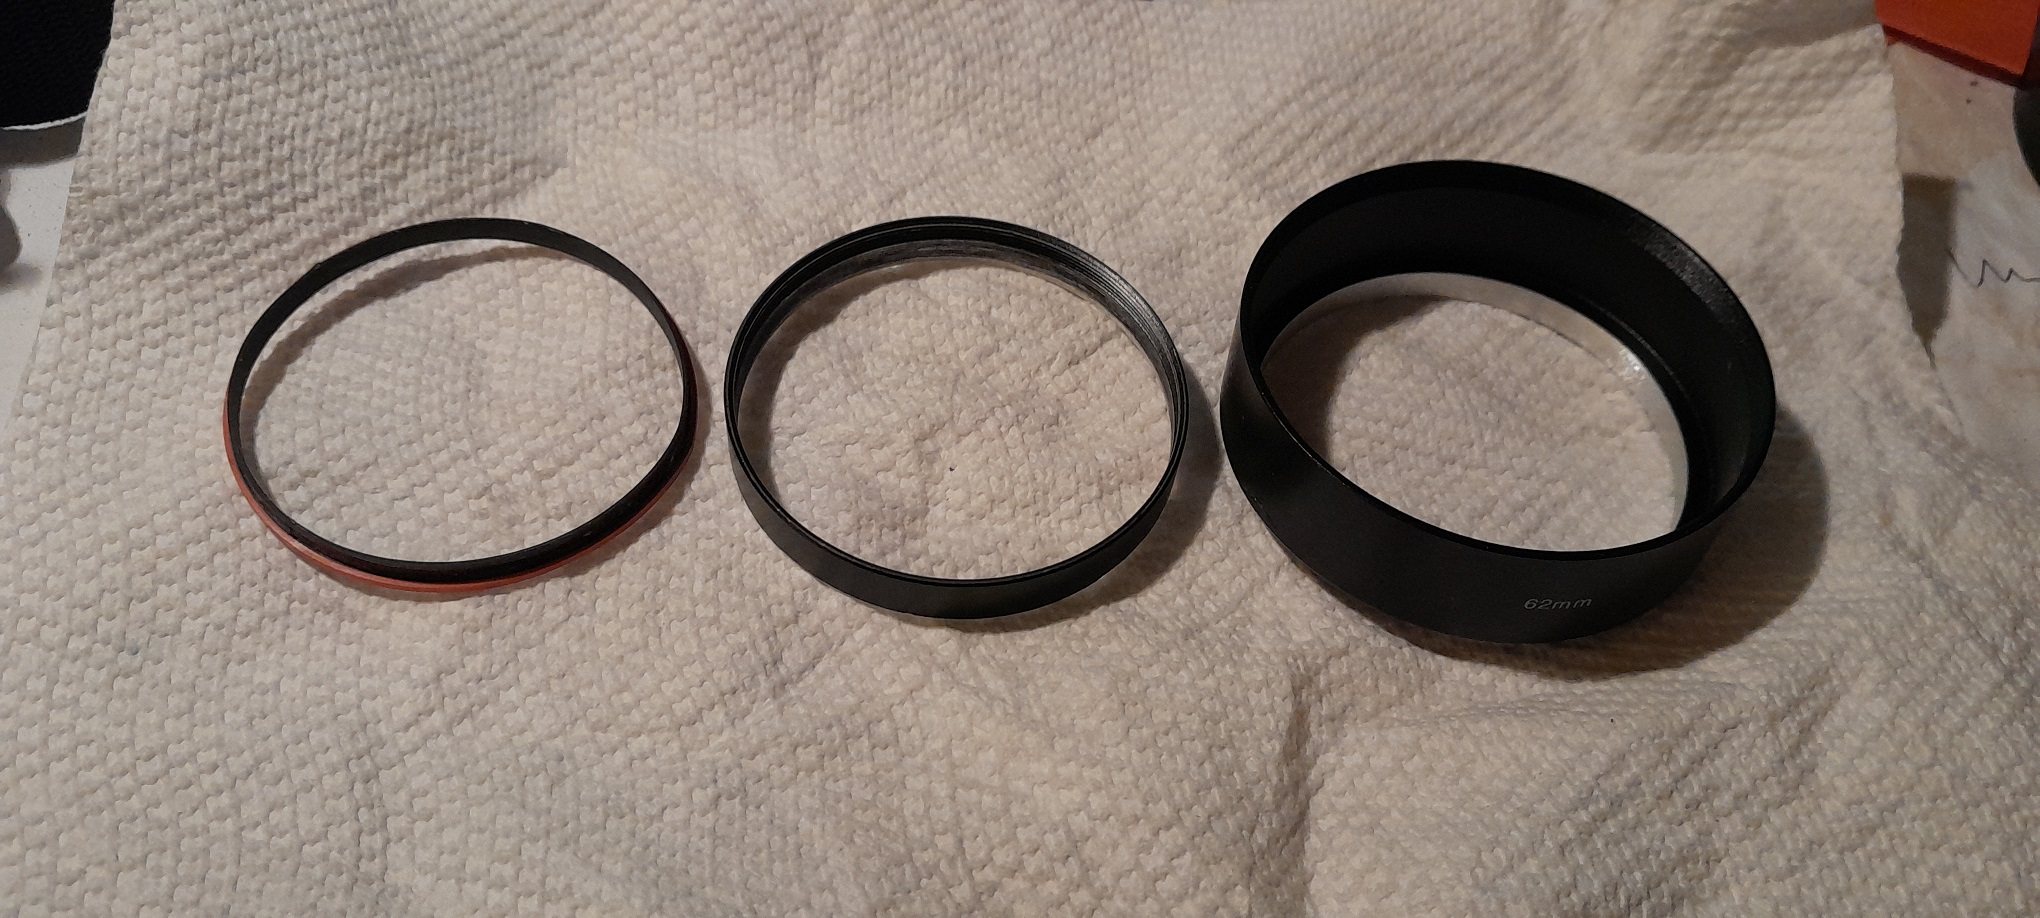
First I built up a ring using layers of plastic shim stock. The idea is that the inner ring is the surface while the outer ring matches the lens outer diameter. There is now room for the hood to screw in between the inner ring and the aluminum ring cut from the 58 mm lens hood (that has a 62 mm filter thread. After lots of work, the key parts are from left to right, the ring made of layers of plastic shim stock assembled with super glue, the ring to attach to the lens cut from a 58 mm lens hood and the 62 mm lens hood. Not shown is the metal 67 mm lens cap.
Note the ring fits easily into the 62 mm lens hood that serves as the lens cap.
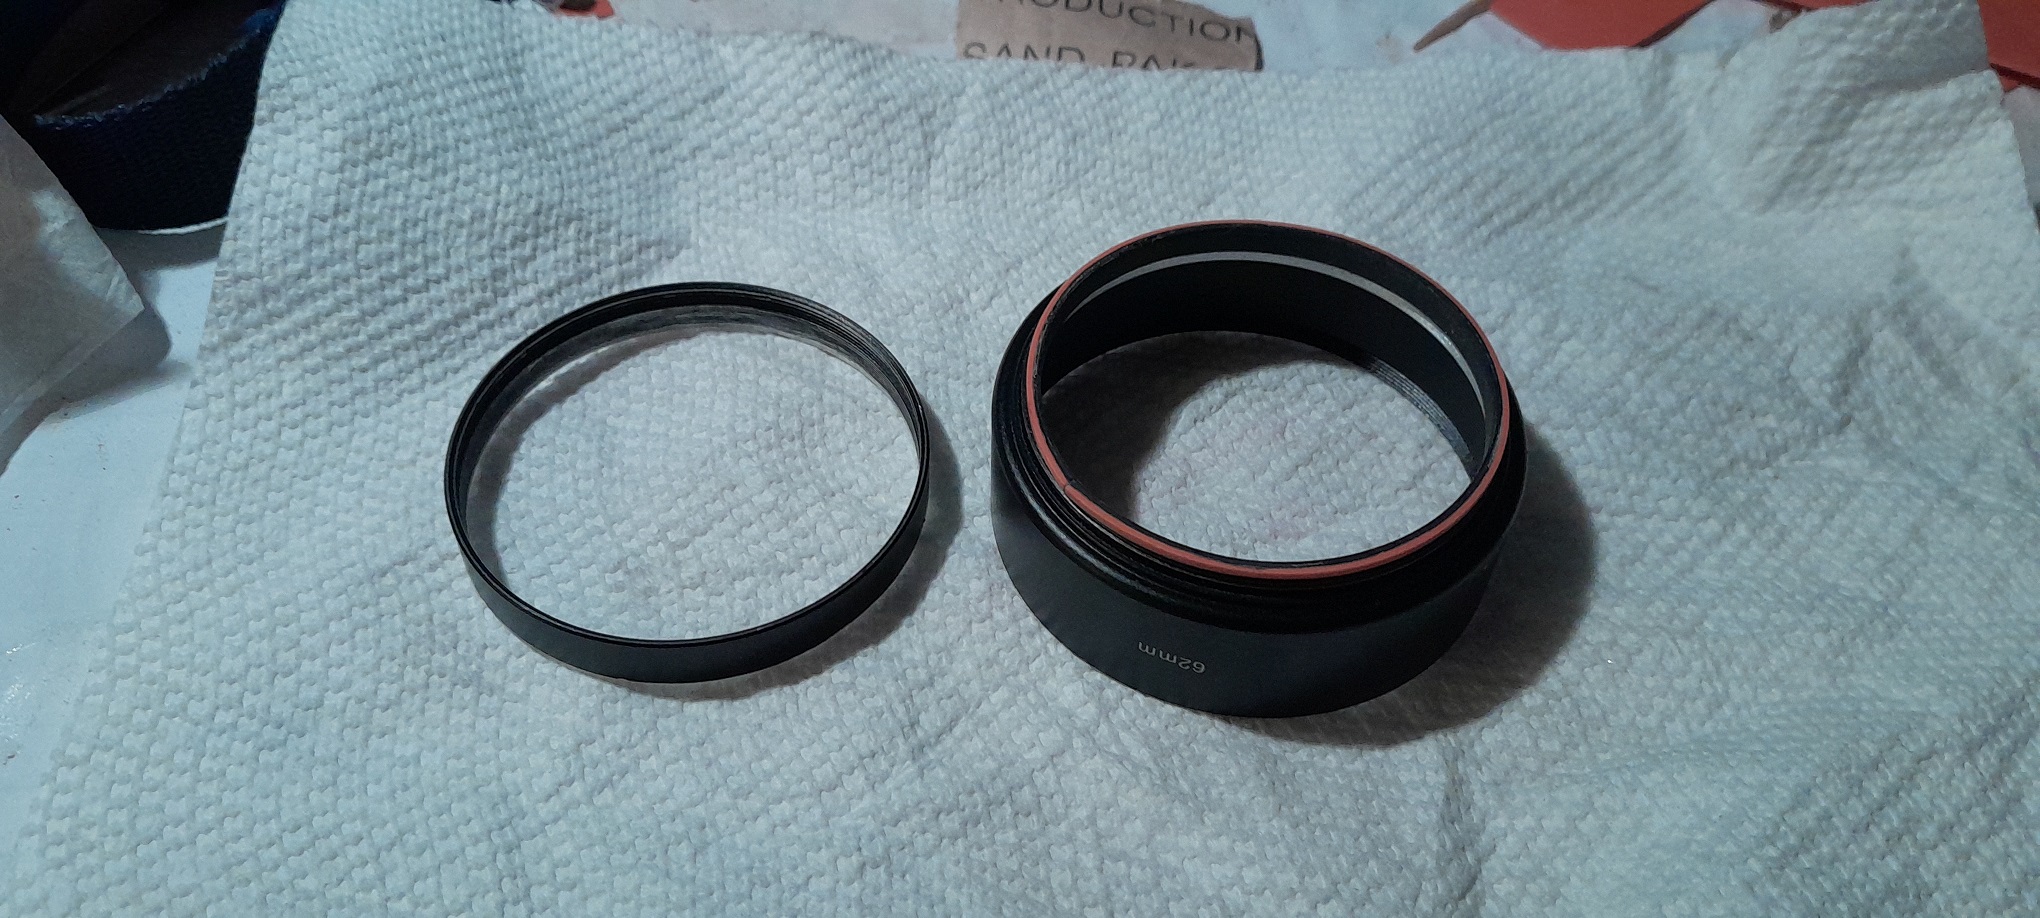
Now the shim stock ring is put into the the ring that will be press fit onto the lens and the hood cap is screwed on the shim stock ring is pushed until the orange ring is against the hood cap edge. This positions the black portion of the shim stock ring to be just above the edge of the press fit ring.

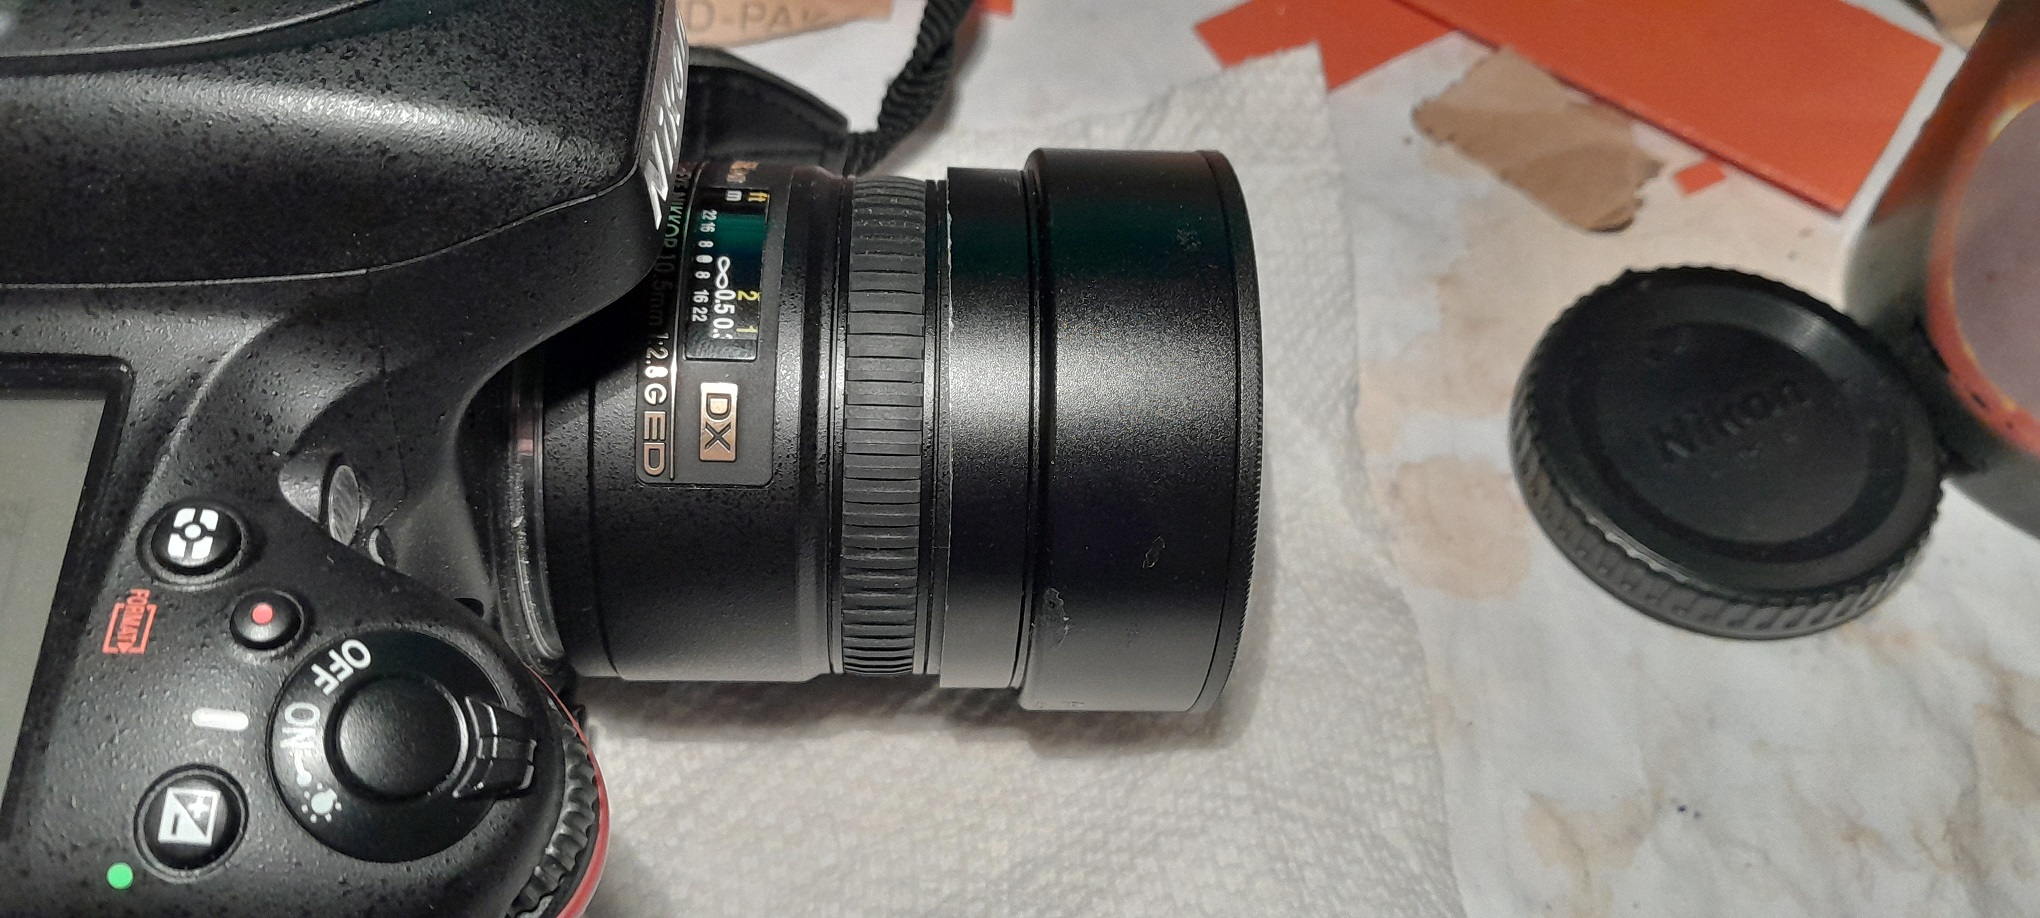
Here is the lens with the lens cap including the metal cap after press fitting everything together.
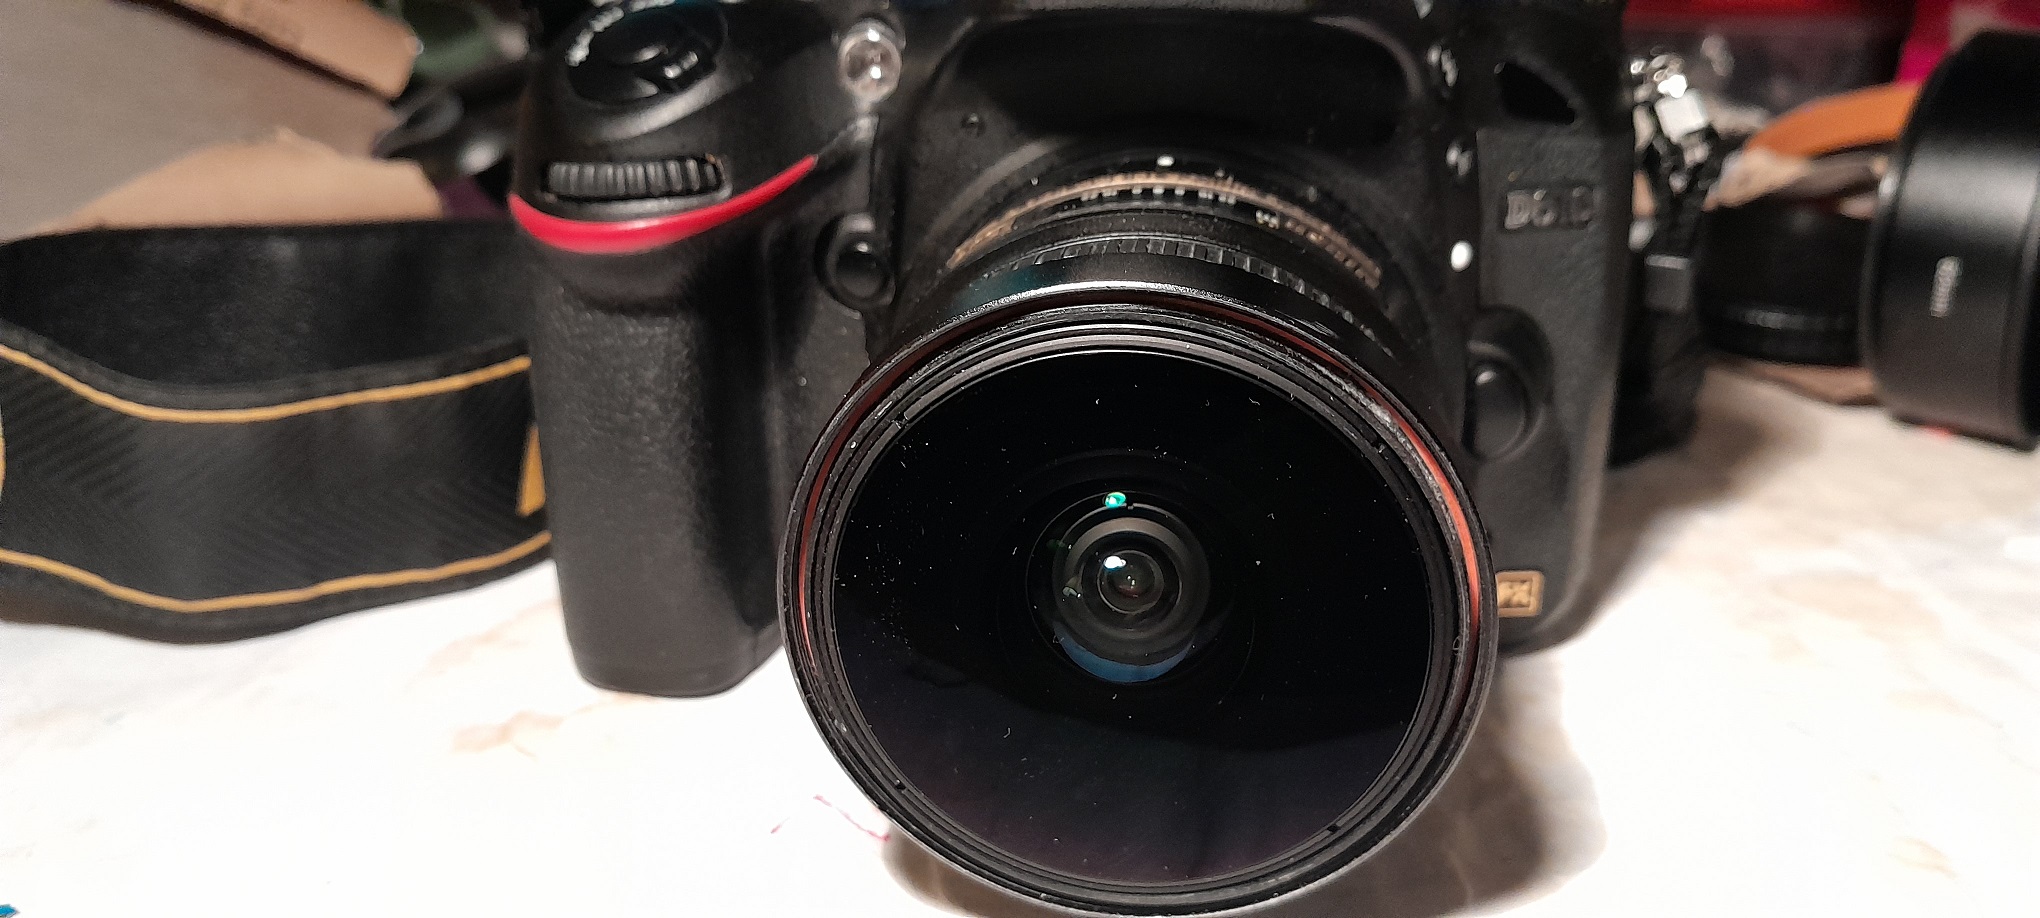
Without the lens cap at far focus and close focus.
Of course this sounds easier than it turned out to be. First, the orange shim ring was originally much wider than the final version to allow the assembly to be glued together. In the this image are the raw parts.
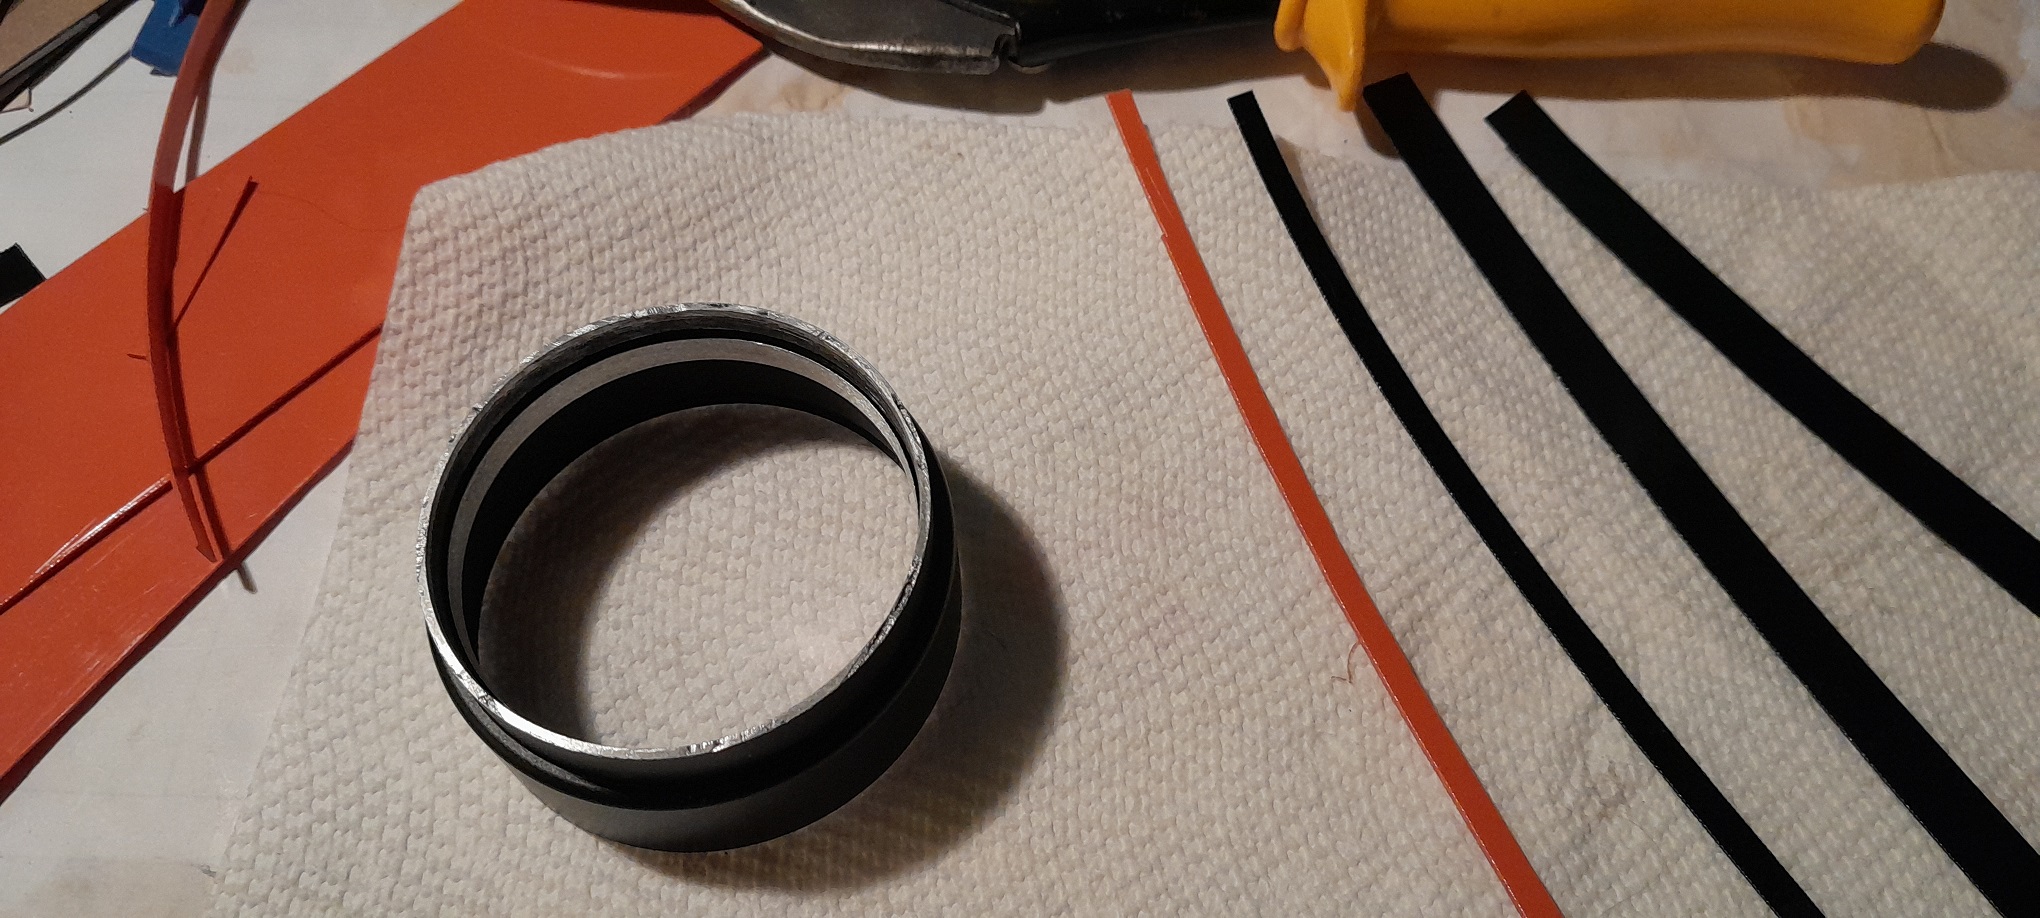
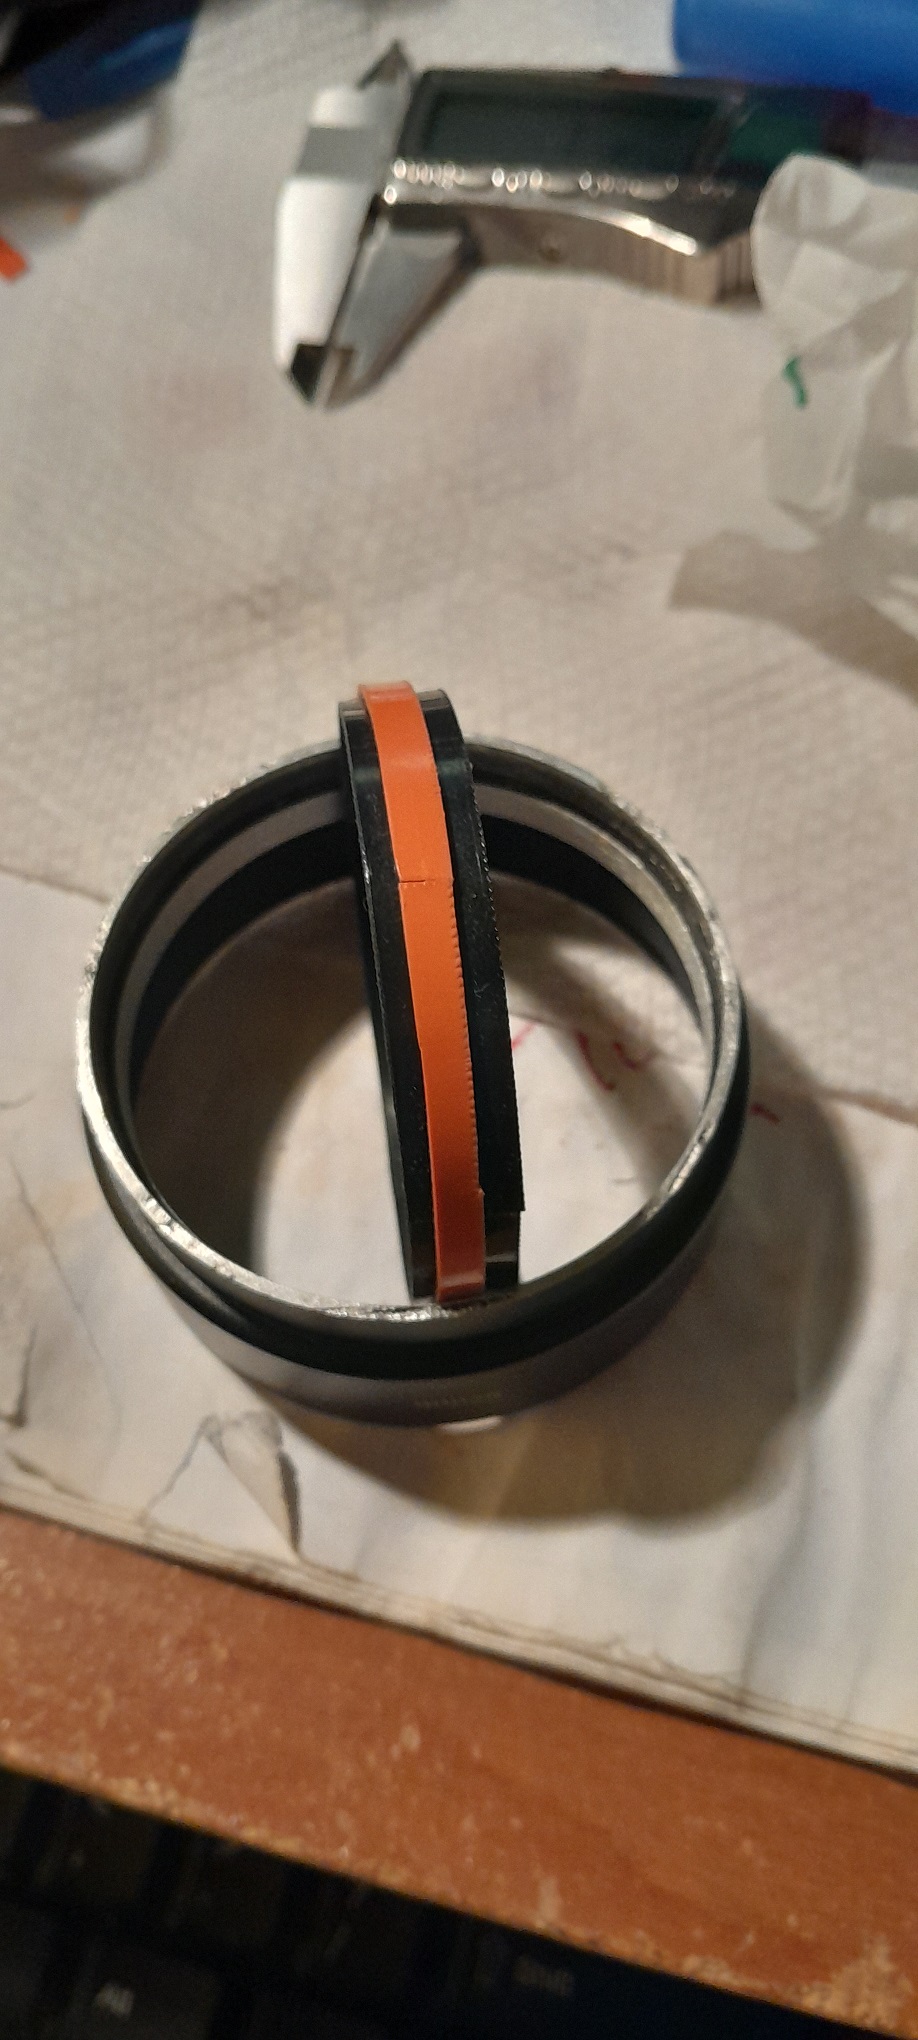
Next the orange ring was placed in the press fit ring and the smaller black shim was glued to it. In this image the two larger black shims that form the inner ring have been placed inside the orange/black ring but haven't been slid to the proper position. Note these are all over length compared to the final assembly.
After some sanding of the orange black ring to square up the surfaces and positioning and gluing the larger black inner ring shims, the ring was sanded until it reached the final 1.75 mm orange ring thickness. Then the entire assembly was sanded until about 4.25 mm tall. This was done so that the shim ring sticks just past the end of the press fit ring. The complicating factor is that I wanted the shim assembly and the press fit assembly to not limit the field of view of the lens but the inner shim ring to cover the entire felt seal ring when the lens is at close focus. The good news is that this is possible if the shim ring extends to the shoulder of the lens at infinity focus, it will then just completely cover the felt ring at closest focus. This does not leave a lot of room for error. Speaking of room for error, I had to sand the inner shim ring a bit so that I ended up with the correct fit where there is some but very little drag due to the felt ring touching the inner shim ring. This was in spite of test fitting all the shim stock pieces before assembly. Somehow after gluing, it ended up a bit too small so some sanding was needed.
All in all, I happy with the way this turned out; it just turned out to be a longer project than originally anticipated. Of course a lot of the difficulty was self inflicted.
P.S. In spite of good hopes for the Bircfhwood Casey Aluminum Black Metal Finish, it really didn't leave much of a permanent finish for me.