Author Topic: Making a Panorama Head with a Difference.  (Read 18874 times)

richardHaw

  • Cute Panda from the East...
  • NG Supporter
  • **
  • Posts: 3150
  • Your lens loverboy
    • Classic Nikkor Maintenance and DIY
Re: Making a Panorama Head with a Difference.
« Reply #75 on: January 09, 2018, 09:03:10 »
any updates?!  :o :o :o

Seapy

  • NG Member
  • *
  • Posts: 830
Re: Making a Panorama Head with a Difference.
« Reply #76 on: January 09, 2018, 17:26:48 »
Well Richard,

I had another session on the lathe last week, I have reduced the outer size to about 303mm dia.  I parted the 'waste' off in the lathe so I still have the material to make two larger heads if I feel the need.  I decided go for the smaller option because I think it will 'get the job done' and be much easier to machine on my friends lathe rather than stretching things trying to work beyond the machines capacity. I do have access to a much larger lathe if I really need to in the future.

I went to an Auto-jumble last weekend, there is a man there who makes and sells lathe tools, so I explained what I needed to make the 45º dovetail grooves and he told me he would make me the exact tool I needed at very modest cost.  That was Saturday, it dropped on my doorstep this morning,  perfect.

I have about 5mm to machine off the outer diameter, I am aiming for 150mm radius at the outside of the curved rail, to give me a fixed datum to measure the lens nodal point settings, because the nodal point will be in clear space, unlike conventional pano heads.  I am still un-decided exactly how I will attach the curved rail to the support arm from the rotating head, there are a number of options which I will choose from once the curved rail is finished and I can visualise the finished article.

I have mastered one or two other tricks with the FreeCad software, but to be honest, now I have that design it's close enough to what I am intending and it helps me visualise the form.  I don't see much need for enhancing it now.

I plan to have another lathe session one evening this week.  Once I have finished the ring, I should be able to do most of the remaining work on my own lathe.
Robert C. P.
South Cumbria, UK

Seapy

  • NG Member
  • *
  • Posts: 830
Re: Making a Panorama Head with a Difference.
« Reply #77 on: February 05, 2018, 12:12:57 »
Much progress has been made since my last post.

I have essentially completed the machining of the main parts with the exception of the detent ring for the click positioning of the rotation, for the D3, 16mm Fisheye combination that will be six clicks @ 60º.

Part of the delay has been clearing my shed to allow the re-assembly of my own lathe, making this pano head is very time consuming and although my friend is very accommodating it entails a 60 mile+ round trip to visit him and also fitting in with his spare time, so having completed what needed his larger lathe, I decided I had to get my own lathe working.  This was my driving motivation! The lathe had been dismantled to make transportation easier.  I got the lathe back together pretty well but when I started the freshly overhauled motor, it ran backwards!!!  ::)  I swapped the two starter winding leads and normal rotation resumed much to my relief and pleasure.  ;D

All these illustrations have been made using my D3300 and the rough 'workshop' badly gouged 18-105 VR lens.

This is the start of creating a groove to enable the ring to be cut from the disk.


The moment the ring separated from the central disk, a moment of tension because I was unsure how it would behave.  Near the bottom is the special tool I had made to cut the grooves for the Arca clamps.


A close up of the tool cutting the groove.


The ring mounted on a face plate, using three nodal rails to hold it. This was to clean up the inner face of the ring after it was cut from the disk.


The boring tool used to clean up the ring.


Machining the mounting clamps from eBay which I will use to mount the curved rail.  This was done on my friends Milling machine. I clamped an Arca rail to the machine bed then clamped the bracket clamp to the rail, that helped to make the repeatability to machine the second bracket clamp.  Notice the spirit level, we machined about 1mm of the plastic and it survived!  Not that it mattered, normally for this purpose it's orientated vertically, so of little use.


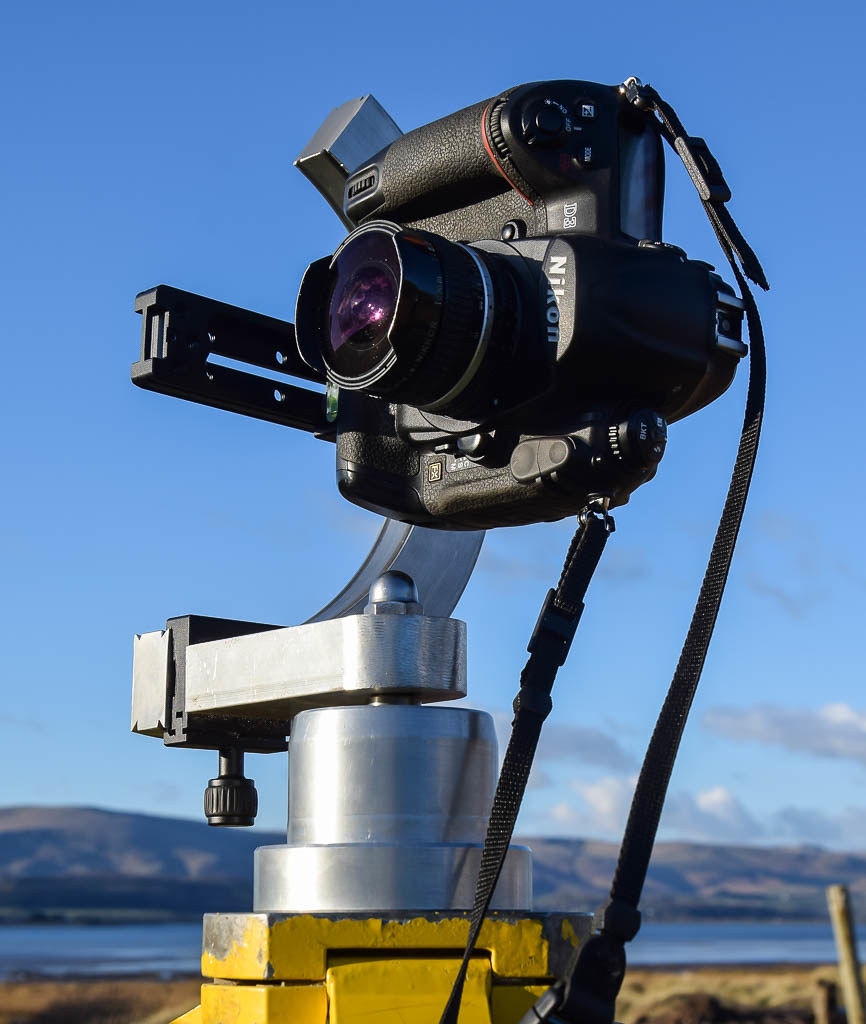
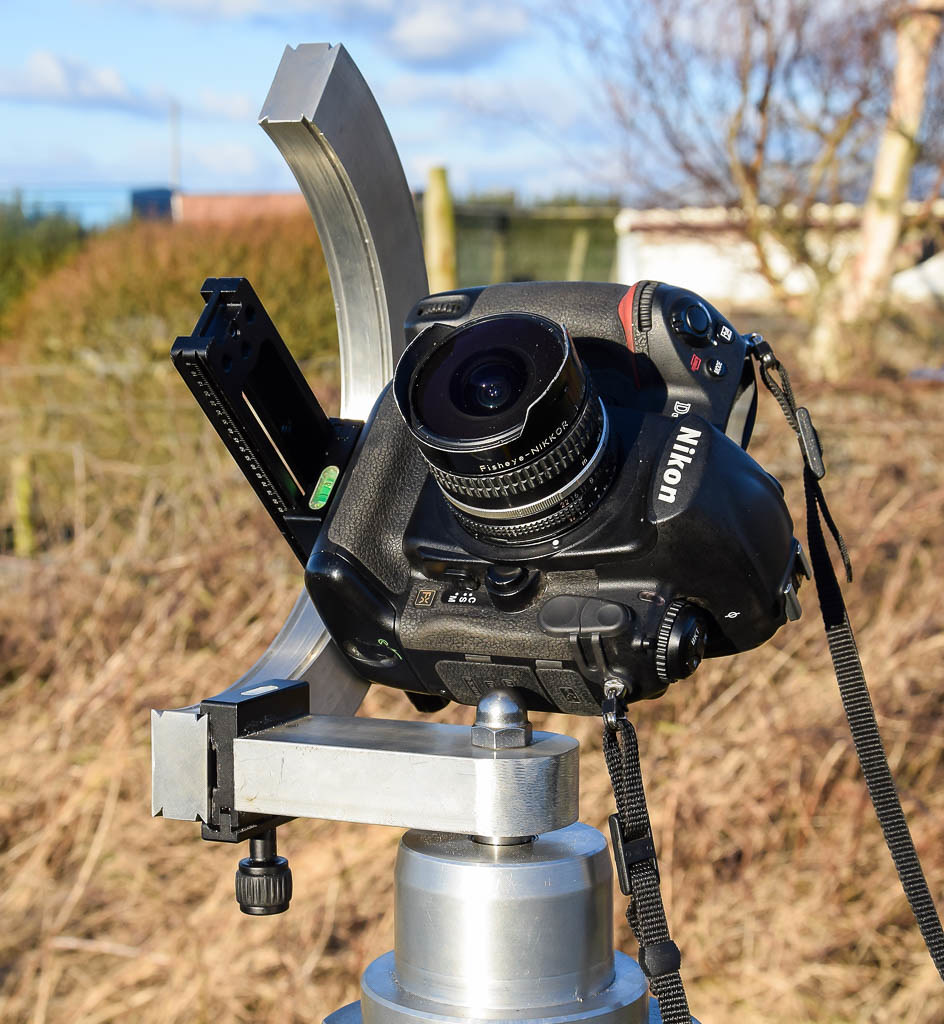
Here is the (almost) finished product.


For comparison the 3D CAD drawing, with the exception of adding the clamp to mount the ring which was an afterthought which made mounting and aligning the ring a doddle.
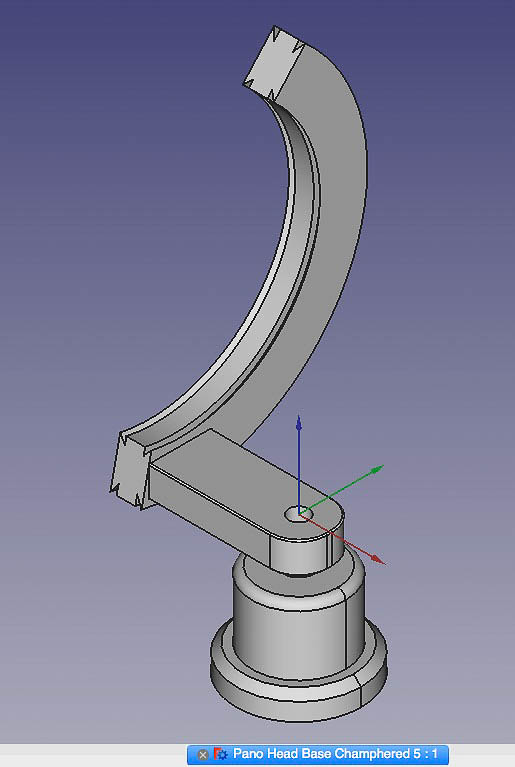


And...


I intend to have the aluminium parts anodised black,  I also intend to calibrate the ring with angles of at least 30º to help repeatability when setting the camera to face up, level or down, which I think will be 30º above and below level.

I have tested the 'nodal' point for the Nikkor 16mm f2.8 Fisheye. The point of zero parallax error, according to my somewhat rough tests, it is perfectly aligned, there appears to be no parallax error, vertically or horizontally.

Robert C. P.
South Cumbria, UK

Bjørn Rørslett

  • Fierce Bear of the North
  • Administrator
  • ***
  • Posts: 8252
  • Oslo, Norway
Re: Making a Panorama Head with a Difference.
« Reply #78 on: February 05, 2018, 12:21:00 »
An amazing feat so far. Congratulations :D

This is the wet dream for our all dear 'Dr. Lens'. I'm certain he would love to hang out with you !!

Seapy

  • NG Member
  • *
  • Posts: 830
Re: Making a Panorama Head with a Difference.
« Reply #79 on: February 05, 2018, 12:31:02 »
Thank you Bjorn!  ;D   Eric is most welcome at my shed anytime...
Robert C. P.
South Cumbria, UK

Seapy

  • NG Member
  • *
  • Posts: 830
Re: Making a Panorama Head with a Difference.
« Reply #80 on: February 05, 2018, 12:37:32 »
I might add, I have also made a second rotating arm, slightly shorter for the D300S/D200IR which obviously have a smaller base to lens centre height.  However, slightly red-faced  :-[  I got the distance 5mm wrong, fortunately too long, so I need to saw 5mm off the arm fo get the nodal point right, in the horizontal plane.  It would be better machined to get a perfectly square and flat face so I may have to think about that...
Robert C. P.
South Cumbria, UK

Erik Lund

  • Global Moderator
  • **
  • Posts: 6490
  • Copenhagen
    • ErikLund.com
Re: Making a Panorama Head with a Difference.
« Reply #81 on: February 05, 2018, 12:41:52 »
Very nice ;) Congratulations!


I use a gimball for these movements
Erik Lund

richardHaw

  • Cute Panda from the East...
  • NG Supporter
  • **
  • Posts: 3150
  • Your lens loverboy
    • Classic Nikkor Maintenance and DIY
Re: Making a Panorama Head with a Difference.
« Reply #82 on: February 05, 2018, 12:43:05 »
so beautiful  :o :o :o

it's a masterpiece! have it anodized for protection and aesthetics 8)

when I was doing these kinds of things, I was using Rhino. autocad and the other one are too technical for me! i was just making CRC parts for toilet fittings  ::)

by the way, you can bore holes to make it lighter but maybe thats not part of your design.

Seapy

  • NG Member
  • *
  • Posts: 830
Re: Making a Panorama Head with a Difference.
« Reply #83 on: February 05, 2018, 13:13:07 »
Very nice ;) Congratulations!


I use a gimball for these movements

Thank you Eric, I just found all the offered gimbal and dedicated Pano heads suffered from an attempt, perhaps necessity? to fit every lens and camera combination imaginable.  To me that lead to far too many compromises.  I don't intend to extend my camera range beyond the D300S/D200IR and D3/D3S, so I don't need to cater for a range of various combinations.  That said, the only part which is affected is the bottom arm, which is easy to make, either longer or shorter...

I also like heavy, robust and solid!  This head is all of those.
Robert C. P.
South Cumbria, UK

Øivind Tøien

  • NG Supporter
  • **
  • Posts: 1754
  • Fairbanks, Alaska
Re: Making a Panorama Head with a Difference.
« Reply #84 on: February 05, 2018, 13:53:09 »

Congratulations, really impressive work!
You now have an excellent  candidate to display in the "Users Showcase" section of the FreeCad forum, there is for instance a continuing thread "From FreeCAD To The Real World"  :) .
Øivind Tøien

Hugh_3170

  • NG Supporter
  • **
  • Posts: 2020
  • Back in Melbourne!
Re: Making a Panorama Head with a Difference.
« Reply #85 on: February 05, 2018, 14:55:29 »
Great work here.  I must say that the parting off operations would have caused me to have my heart in my mouth.

(Finally Robert, I must now rest my earlier case - George Daniels would have definitely been impressed!  ;D)
Hugh Gunn

golunvolo

  • NG Supporter
  • **
  • Posts: 6784
  • You ARE NikonGear
Re: Making a Panorama Head with a Difference.
« Reply #86 on: February 05, 2018, 15:15:58 »
Congratulations! What a beautiful project.

Jack Dahlgren

  • NG Member
  • *
  • Posts: 1528
  • You ARE NikonGear
Re: Making a Panorama Head with a Difference.
« Reply #87 on: February 05, 2018, 16:59:17 »
The lathe had been dismantled to make transportation easier.  I got the lathe back together pretty well but when I started the freshly overhauled motor, it ran backwards!!!  ::)  I swapped the two starter winding leads and normal rotation resumed much to my relief and pleasure.  ;D

Might be a good idea to have those inputs switchable in the event you make a mistake and want to put the material back on.

Akira

  • Homo jezoensis
  • NG Supporter
  • **
  • Posts: 12563
  • Tokyo, Japan
Re: Making a Panorama Head with a Difference.
« Reply #88 on: February 05, 2018, 18:24:54 »
Robert, this is an amazing job!  The head looks like and artwork.

From now on, you will be known as Dr. Lathe in this forum, along with Erik a.k.a. Dr. Lens.   You rhyme well together.
"The eye is blind if the mind is absent." - Confucius

"Limitation is inspiration." - Akira

MILLIREHM

  • NG Supporter
  • **
  • Posts: 854
  • Vienna, Austria
Re: Making a Panorama Head with a Difference.
« Reply #89 on: February 05, 2018, 22:24:45 »
Impressive Work
Wolfgang Rehm